Archive for the ‘wood signs’ Category
This Restaurant Sign Needed a Passport Stamp of Approval
Dimensional Restaurant Signs
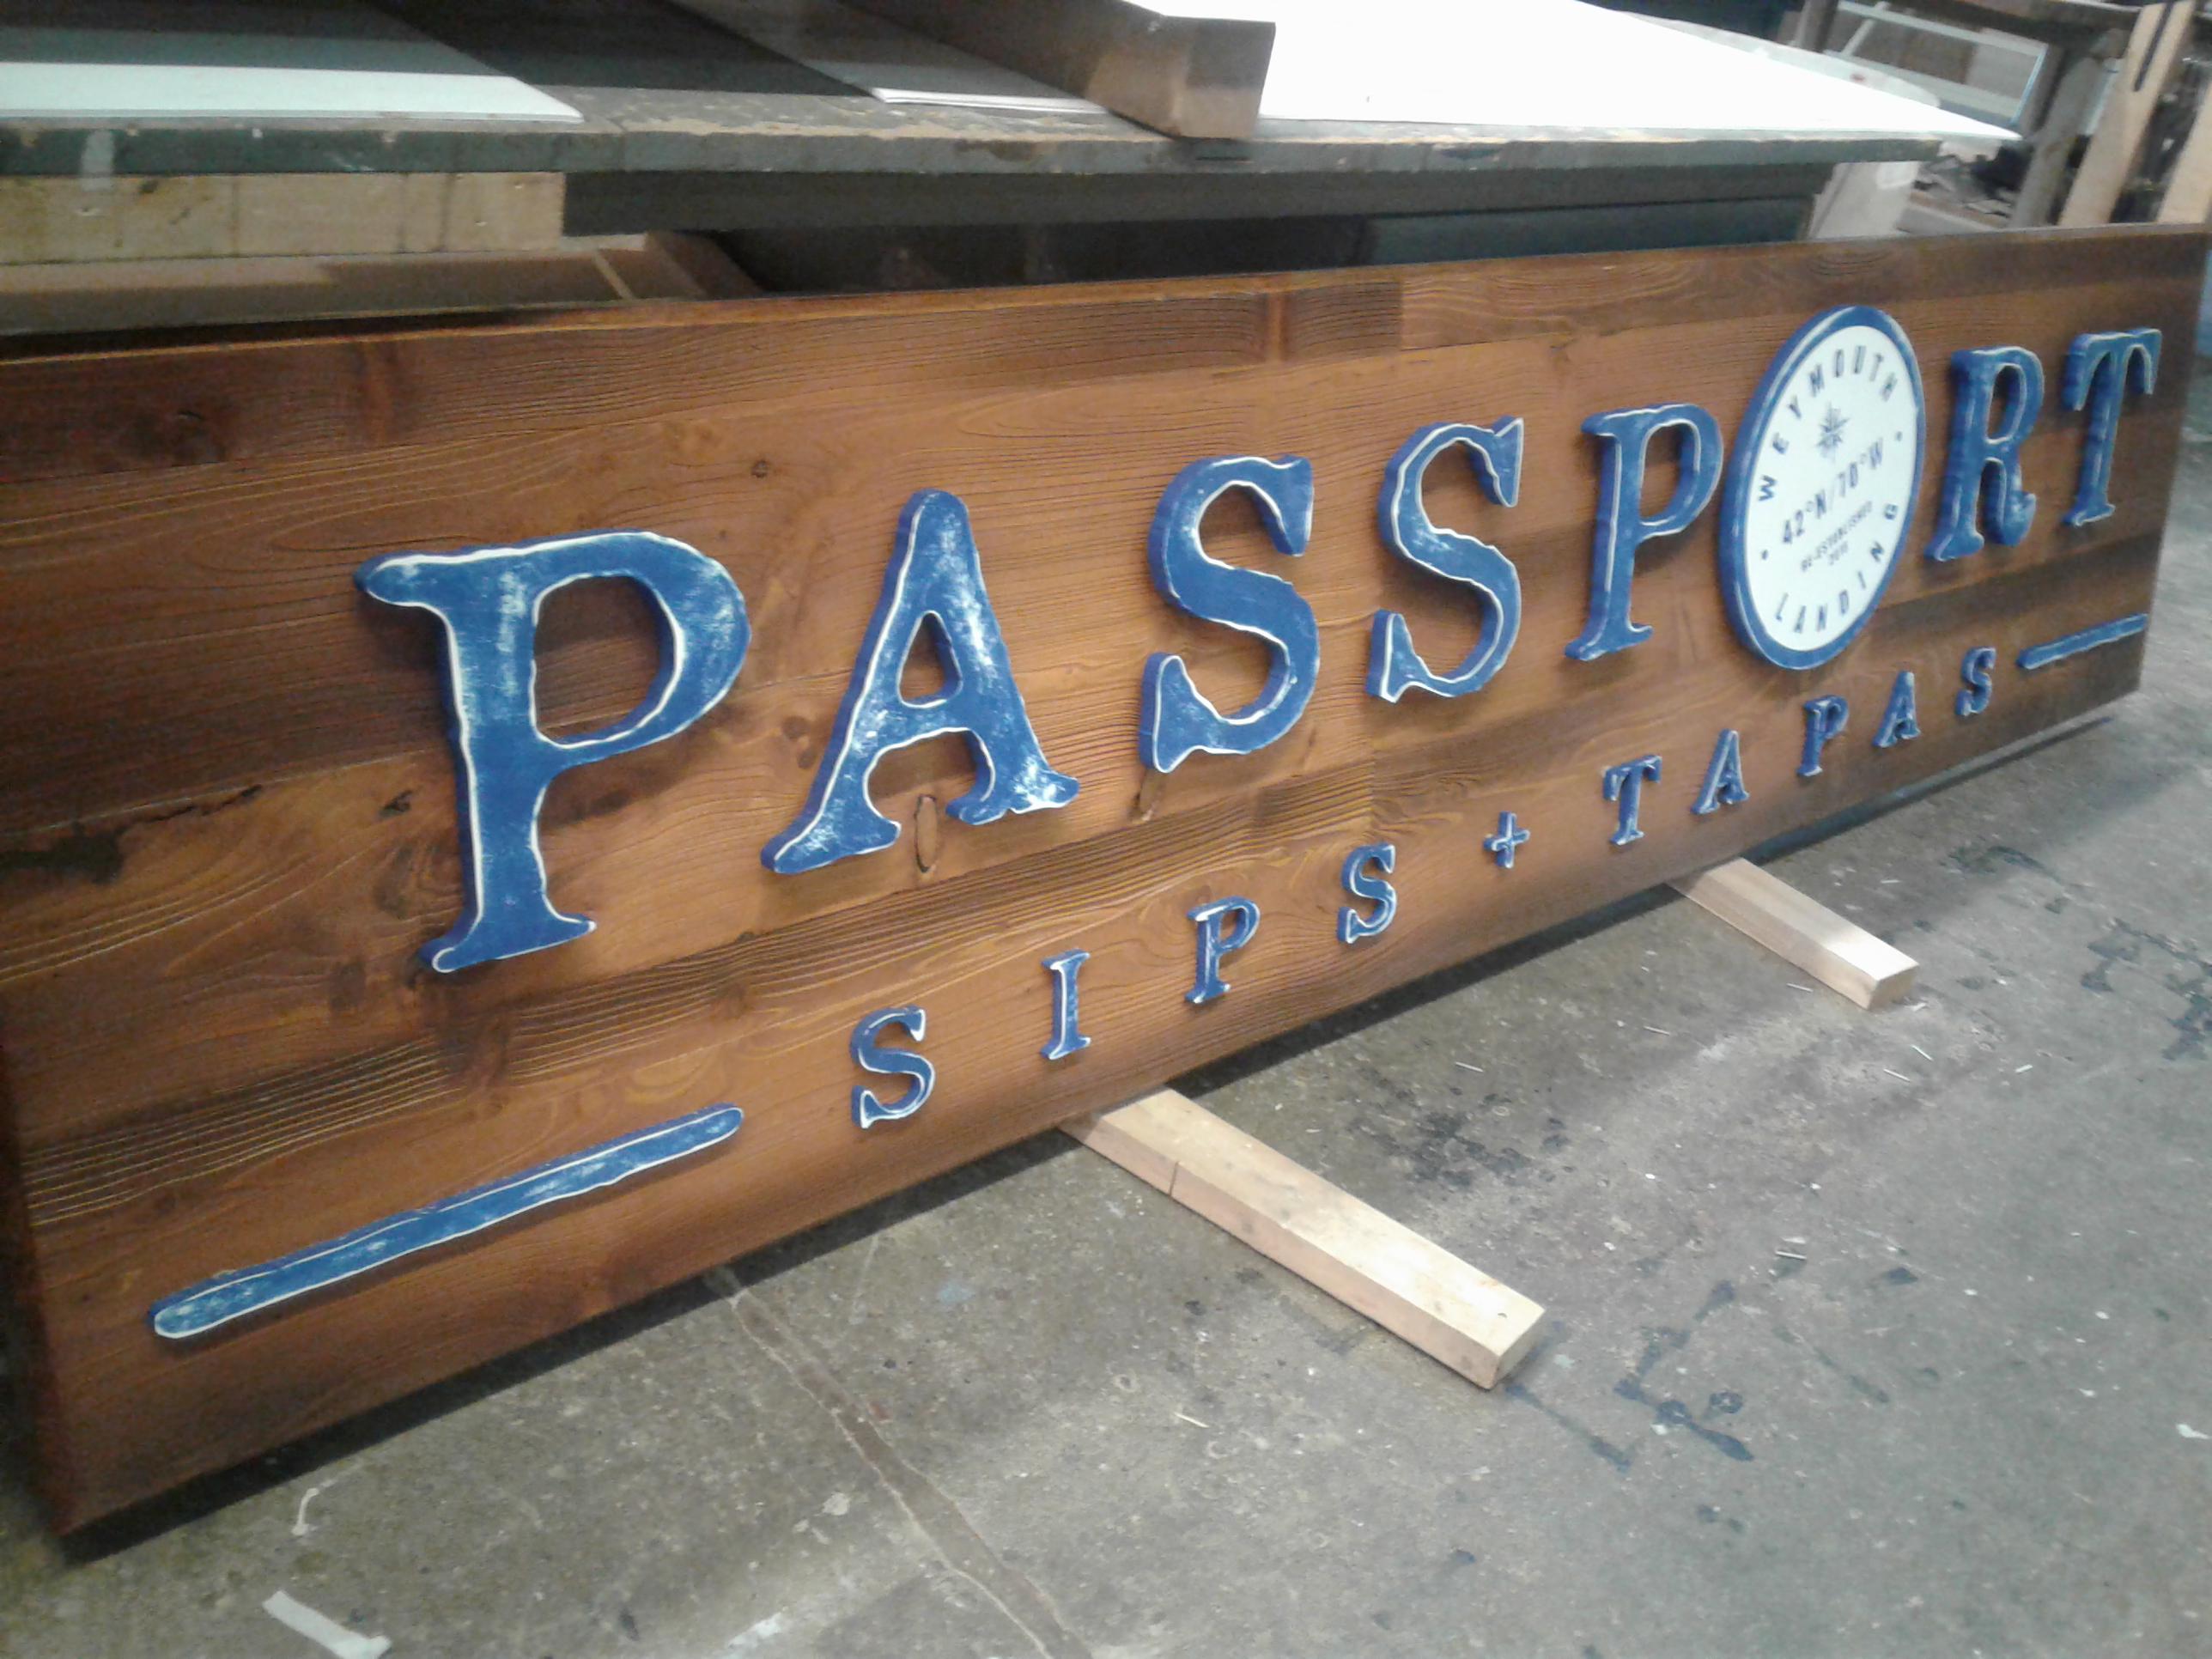
Last year the owner of PASSPORT SIPS + TAPAS contacted us after being inspired by our barn board signs post and wanted something similar but with a few minor changes to fit their brand. Their visual marketing strategy is to connect their branding to the “passport stamp” within their logo using a dimensional restaurant sign to make it very eye-catching. In order to accomplish this, the sign makers here at The Sign Depot created this exterior sign from two different materials to create the style that Passport Sips + Tapas was looking for.
Creating the Passport Sips + Tapas Custom Sign
This sign was mix of pine wood and outdoor PVC. The first step was to create a pine wood backer, then distress the wood. Two different hues were used when finishing the wood to give it more dimension. Next the individual PVC letters and logo were cut out on our CNC router table and given an outdoor paint finish with minor distressing done to the paint. As you can see in the image below the letters were prepared for pin mount installation on to the wood sign backer.
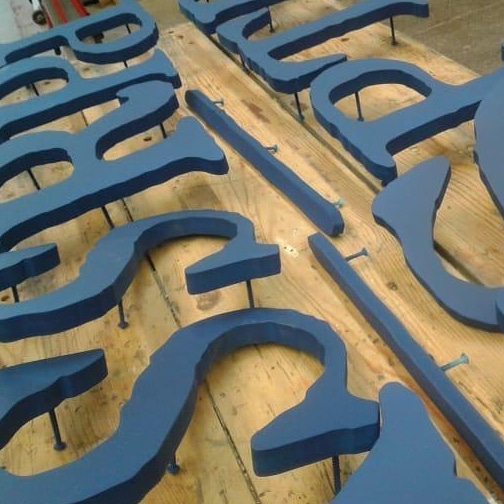
The last part of the sign project was to insert the passport stamp image into the letter “O” in the word passport to make it the focal point of the sign.
Next the sign was assembled and prepped for shipping, which included a custom made wood case to ensure the sign arrived safely.
The Passport That Crossed The Border
Here at The Sign Depot, we manufacture many signs that are shipped into the United States. We just thought it was such a fun play on words that we were fabricating a sign with the word PASSPORT that would be crossing border. Now it is great to see from their Instagram page that their restaurant is in full swing and the sign provides a welcoming entrance-way to the establishment.
With more that 25 years experience creating custom restaurant signs, we look forward to assisting with your upcoming sign projects. Visit our CONTACT US page to connect with us!
What is a Custom Sandblasted Sign and How are they Made?
What goes into making a Custom Sandblasted Sign?
We often have people popping in our workshop to inquire about the different types of signs we make. We always want to give our clients a lot of choice and let them know all the signage products that are available to them. Choosing the material that suits their style and their budget is what the sign experts here at Sign Depot pride themselves in. A great technique is sandblasting. Sandblasting allows for full customization of the sign. This means that you have a lot of options when it comes to creating the sign best suited for you.
Materials
We have sandblasted several materials including stone, mdf and wood. When it comes to wood we prefer to use western red cedar because of it being rot resistant. Cedar signs have a long life and with a little bit of care your custom sign will always look spectacular.
Design
Here are some items that our designers will want to know when preparing your sign design
- Size
- Shape
- Colours
- Graphics
- Text
If you come in with some of these points ready, the sign designers can have some choices for you to pick from. Once the design is ready you’ll be sent an image for approval. After approval production can begin.
Pre-Production
There are few steps in the pre-production of a sandblasted sign. Once the stone has been selected or the wood has been cut to the desired shape, the rubber stencil made to match your choice of material. The stencil is cut out on the plotter and then applied to the surface of the selected sign material.
Sandblasting
Once the sign is prepped for manufacturing the sandblasting can begin. Sandblasting is a process when abrasive grit is pumped through a hose by forced air to carve the design and text into the sign’s surface. The design is created through the cutout parts of the rubber stencil. Those parts are sunk into the wood while the spots that are fully covered by the rubber stay protected resulting in a raised surface. This Sign Depot block is a great example of the sandblasting technique.

The blue areas are the spots where the cedar was protected by the rubber stencil, and then natural wood showing through shows where the stencil was cut out allowing the sandblasting to cut away at the wood.
Finishing
After the sign has been sandblasted it will be sanded to a smooth surface for the proper finish to adhere to. Finishes come in choices of stains, paints and vinyls. The finishing is very important as it is the final step before your sign leaves the shop. Finding a finish best suits the conditions where your sign will be placed is very important. Whether your sign will be indoor or outdoor, if it will be in direct sunlight or a sheltered area are things to consider when choosing the finish for your custom sandblasted sign.
That is how a sandblasted sign created here at Sign Depot. To see more examples check out our photo galleries on our main website and our facebook page. Have additional questions about sandblasting? Tweet them to us, or leave a comment below.